


SERVICE
We Are Your Metal Wire Mesh Products Manufacturing Partner
Installation
How to install the Steel Security Fencing?
The process of installing a metal fence varies according to specific factors, including:
- The type of mesh chosen (welded mesh fence, palisade fence, steel fence and others);
- The type of soil on which the installation will be carried out;
- The primary purpose of the fence itself: anti-intrusion, protective, ornamental, etc.
The steel security fences except for the temporary fences have similar installation method. It depends on the soil condition. You need to analyse the features of the land where the installation is to be carried out. Factors such as slopes and soil composition can actually impact your choice of fencing and installation methods. For example, if the soil is robust and compact it can be used as a base for the installation of the posts, but otherwise concrete or screw piles should be used.
According to the soil condition, we classify two installation types: buried or bolt-down.
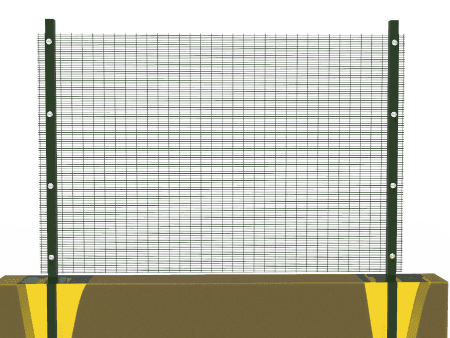
Here we will take 358 high security fence as sample to introduce the installation method.
① Installation Method 1: Buried
Buried installation method is suitable for the loose terrains, including residences, garden, backyard, construction sites, slope and other places.
Step 1 – Mark the Posts
Mark the locations for your posts with the spray paint. The width between each post depends on the length of each fence section. Re-measure each fence section to insure accuracy.
Step 2 – Dig Holes
First of all, you need to dig a hole (measuring around 35 to 40 cm on each side) between 25 cm and 50 cm deep depending on the height of the post. You can now spread a layer of well-compacted gravel (about 10 cm) at the bottom of the hole to serve as a base for the concrete block. Check that the hole depth is correct by inserting the post: if the distance from the ground to the top of the post is the height of the mesh plus 5 cm, you can continue to the next step.
Step 3 – Install Posts
Pour quick set cement, add the post and water. Stir. Take a level and make sure your post is straight. Let all posts set for at least 24 to 48 hours.
Step 4 – Install the Fences
Install the fences in between the posts. Secure firmly in place using assorted accessories and bolts and nuts. Keep using the level to insure a straight and correct installation.
Warming up: Do not leave a large gap in between the ground level and the bottom of your fence line in case of unauthorized access.
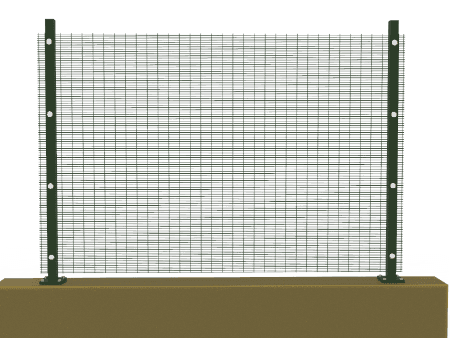
②Installation Method 2: Bolt-Down
A drawing shows the buried installation of 358 high security fence
Bolt-down installation method is commonly used in the concrete and hard terrains, such as concrete floors, communities, commercial sites, airport, prison, industrial zones, warehouse partitions and other needed places.
Step 1 – Mark the Posts
The first step of bolt-down method is similar to the buried method. Mark the four hole locations of your posts with the spray paint. The width between each post depends on the length of each fence section. Re-measure each fence section to insure accuracy.
Step 2 – Drill holes
Drill holes with professional tools at the marked position. The hole depth depends on the bolts length.
Step 3 – Install Posts
Raise the post at the right position and bolt down with assorted bolts. Take a level and make sure your post is straight.
Step 4 – Install the Fences
Install the fences in between the posts. Secure firmly in place using assorted accessories and bolts and nuts. Keep using the level to insure a straight and correct installation.

Contact Us
Xutuan Industrial Zone, Anping county, Hengshui, Hebei, China
Our Products
Mobile Site